First Django App
A step-by-step guide to creating a simple web application that displays Maryland Notices of Intent to Foreclose by Zip Code data.
You will learn just enough about the Django framework to design database tables, load in data and display it at different URLs based on the data.
What you will make
This tutorial will guide you through creating a custom Django app displaying information about Maryland foreclosure notices.
Prelude: Prerequisites
Before you can begin, your computer needs the following tools installed and working.
An account at GitHub.com
Act 1: Hello Django
Start at our first-django-app-umd directory.
$ mkdir first-django-app-umd
$ cd first-django-app-umd
Use pip on the command line to install Django, a Python “framework”
we’ll use to put together our website.
$ pip install Django
Now use Django’s django-admin command to create a new project that will be organized according to the framework’s rules. We’ll creatively call it “project”.
$ django-admin startproject project
Now jump into the project and we’ll start setting it up.
$ cd project
Note
Run the ls command, which lists the files in your current location. Wonder what all those weird files are in your new directory? We’ll only need a couple for this tutorial, but you can read about all of them in the official Django documentation.
There is a lot of configuration that could be done at this point, but we’re going to advance with all of the Django defaults in place.
The first step is creating your database, which will appear as a new SQLite file named db.sqlite3.
To do that, we will start using the manage.py file created by startproject. It is a utility belt we can use to make Django a wide range of things. The command we want now, migrate, can create database tables.
$ python manage.py migrate
Fire up Django’s built-in web server.
$ python manage.py runserver
You should get a popup window in your codespace that takes you to your browser to see Django in action. Here’s what you should see.
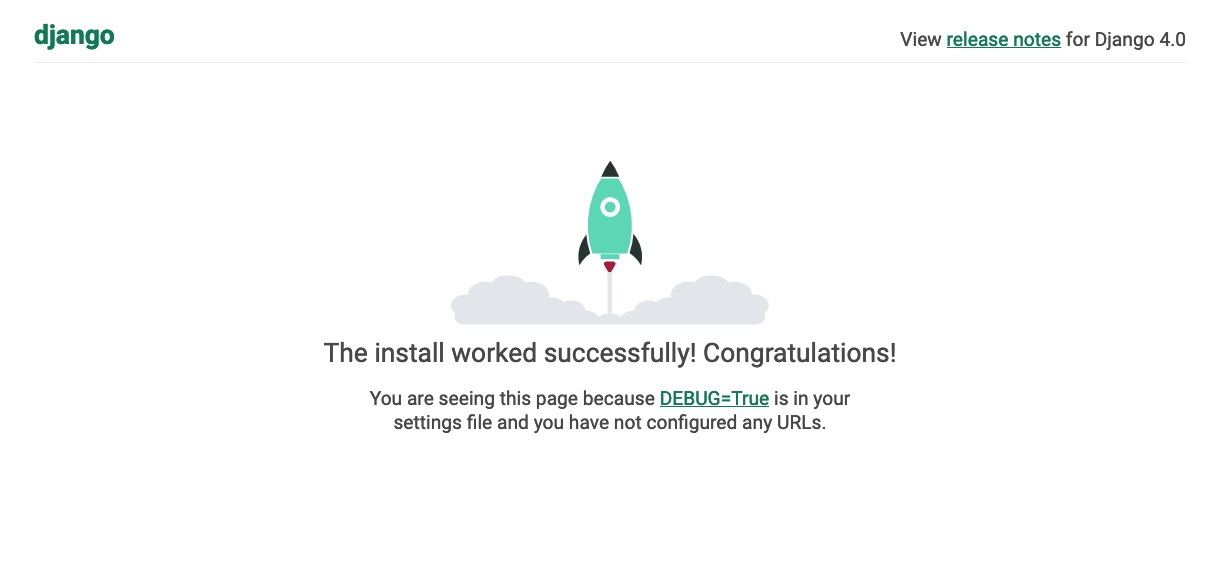
Congratulations. You’ve installed Django and have a blank site started up and running. Now the real work begins.
Act 2: Hello models
Now we create our app. In Django terms, an app is a collection of files that does something, like publish a blog or store public records. A project, like we made above, collects those apps and organizes them into a working website.
You can create a new app with Django’s startapp command. Since we are aiming to make a list of foreclosure notices, naming this one isn’t too hard.
Return to your terminal and hit the combination of CTRL-C, which will terminal your test server and return you to the command line. Then use our friend manage.py to create our app.
$ python manage.py startapp foreclosures
There should now be a new foreclosures folder in your project. If you look inside you will see that Django created a series of files common to every app.
foreclosures/
    __init__.py
    admin.py
    apps.py
    migrations/
    models.py
    tests.py
    views.py
The file called models.py is where we will design our database tables. Another called admin.py is where we will configure the panels where reporters will be able to enrich the source data.
But before we do any of that, we need to configure our project to include our new app. Use your code editor to open the file settings.py in the project directory. Add our app, academy, to the INSTALLED_APPS list you find there.
  INSTALLED_APPS = (
      'django.contrib.admin',
      'django.contrib.auth',
      'django.contrib.contenttypes',
      'django.contrib.sessions',
      'django.contrib.messages',
      'django.contrib.staticfiles',
      'foreclosures',
  )
Note
Python, like most programming languages, is very strict. When you add a new word to a list, as we did above, it always needs to be followed by a comma and surrounded by quotes. The indentations are also very stict and need to be consistent from line to line. Also, lines starting with # or surrounding by “”” quotes are comments that will not be run as code and are instead there only as documentation.
Next open up the models.py file in the foreclosures app’s directory. Here we will use Django’s built-in models system to design a database table to hold the source data.
Each table is defined using a Python class that inherits special powers from Django. Those special powers allow it to synchronize with an underlying database. Our work begins by creating our class and naming it after the data we’ll put inside.
from django.db import models

# Create your models here.
class Notice(models.Model):
Note
Don’t know what a class is? Don’t stress out about it. It’s a little tricky to explain, but a class is basically a blueprint for designing how information in your code is structured. In our case, we’re creating a blueprint that will link up our data with a traditional database table (this is often called a schema).
Next, like any good database table, it needs some fields.
If you open the source CSV, you will see that is has eight columns.
Django has some fancy tricks for defining fields depending on what kind of data they hold. Now we’ll use the CharField to expand our models to hold the bioguide, office, program and category data from our source. It just so happens, that CharFields have a maximum length that must always be set. We’re going to pick a couple big numbers for that.
  from django.db import models

  # Create your models here.
  class Notice(models.Model):
      bioguide_id = models.CharField(max_length=7)
      office = models.CharField(max_length=500)
      program = models.CharField(max_length=500)
      category = models.CharField(max_length=500)
      year_to_date = models.DecimalField(max_digits=20, decimal_places=2)
      amount = models.DecimalField(max_digits=20, decimal_places=2)
      year = models.IntegerField()
      quarter = models.IntegerField()
Note
Watch out. You’ll need to carefully indent your code according to Python’s very strict rules for this to work.
Congratulations, you’ve written your first model. But it won’t be created as a real table in your database until you run what Django calls a “migration.” That’s just a fancy word for syncing our models with our database.
Make sure to save your models.py file. Then we’ll manage.py to prepare the changes necessary to create your new model.
$ python manage.py makemigrations foreclosures
Now run the migrate command to execute it.
$ python manage.py migrate foreclosures
That’s it. You’ve made a database table. Let’s do the same for the detail expense file. There are a few more fields but many of them are the same as the Summary model.
from django.db import models

class Notice(models.Model):
    bioguide_id = models.CharField(max_length=7)
    office = models.CharField(max_length=500)
    program = models.CharField(max_length=500)
    category = models.CharField(max_length=500)
    year_to_date = models.DecimalField(max_digits=20, decimal_places=2)
    amount = models.DecimalField(max_digits=20, decimal_places=2)
    year = models.IntegerField()
    quarter = models.IntegerField()

class Detail(models.Model):
    bioguide_id = models.CharField(max_length=7)
    office = models.CharField(max_length=500)
    quarter = models.CharField(max_length=1)
    program = models.CharField(max_length=500)
    category = models.CharField(max_length=500)
    sort_sequence = models.CharField(max_length=500)
    date = models.DateField(blank=True, null=True)
    transcode = models.CharField(max_length=15)
    recordid = models.CharField(max_length=500, blank=True, null=True)
    payee = models.CharField(max_length=500)
    start_date = models.DateField(blank=True, null=True)
    end_date = models.DateField(blank=True, null=True)
    purpose = models.CharField(max_length=500)
    amount = models.DecimalField(max_digits=20, decimal_places=2)
    year = models.IntegerField()
Make sure to save your models.py file. Then we’ll manage.py to prepare the changes necessary to create your new model.
$ python manage.py makemigrations foreclosures
Now run the migrate command to execute it.
$ python manage.py migrate foreclosures
Now you’ve made two database tables!
Act 3: Hello loader
Our next challenge is to load the source CSV file into the model.
We are going to do this using Django’s system for management commands. It allows us to make our own manage.py commands like migrate and startapp that take advantage of Django’s bag of tricks and interact with the database.
To do this, add a management/commands directory in our foreclosures app, complete with empty __init__.py files required by Python. You can do this in your operating system’s file explorer, or on the command line. From a Linux or OSX prompt that would look something like this.
# The -p flag here makes both new directories
$ mkdir -p foreclosures/management/commands
# This creates the empty files on Macs or in Linux
$ touch foreclosures/management/__init__.py
$ touch foreclosures/management/commands/__init__.py
From Windows something more like this:
# If you're in Windows create them with your text editor
$ start notepad++ foreclosures/management/__init__.py
$ start notepad++ foreclosures/management/commands/__init__.py
When you’re done the app’s directory should look something like this.
foreclosures/
    __init__.py
    admin.py
    apps.py
    models.py
    management/
        __init__.py
        commands/
            __init__.py
    migrations/
    tests.py
    views.py
Create a new file in the management/commands directory where the new command will go. Let’s call it load_summary.py.
# Mac or Linux
$ touch foreclosures/management/commands/load_summary.py
# Windows
$ start notepad++ foreclosures/management/commands/load_summary.py
Open it up and paste in the skeleton common to all management commands.
from django.core.management.base import BaseCommand

class Command(BaseCommand):

    def handle(self, *args, **options):
        print("Loading CSV")
Running it is as simple as invoking its name with manage.py.
$ python manage.py load_summary
Download the source CSV file from GitHub and store it in your base directory next to manage.py.
Return to the management command and introduce Python’s built-in csv module, which can read and files CSV files.
import csv
from django.core.management.base import BaseCommand

class Command(BaseCommand):

    def handle(self, *args, **options):
        print("Loading CSV")
Next add a variable beneath the print command that contains the path to where you’ve saved the CSV file. If you’ve saved it next to manage.py, that is as simple as starting off with “./”.
import csv
from django.core.management.base import BaseCommand

class Command(BaseCommand):

    def handle(self, *args, **options):
        print("Loading CSV")
        csv_path = "./summary.csv"
Note
In case you don’t already know, a “variable” is a fancy computer programming word for a named shortcut where we save our work as we go.
Now access the file at that path with Python’s built-in open function.
import csv
from django.core.management.base import BaseCommand

class Command(BaseCommand):

    def handle(self, *args, **options):
        print "Loading CSV"
        csv_path = "./summary.csv"
        csv_file = open(csv_path, 'r')
Feeding the file object it creates into the csv module’s DictReader will return a list with each row read to work with.
import csv
from django.core.management.base import BaseCommand

class Command(BaseCommand):

    def handle(self, *args, **options):
        print "Loading CSV"
        csv_path = "./summary.csv"
        csv_file = open(csv_path, 'r')
        csv_reader = csv.DictReader(csv_file)
Create a loop that walks through the list, printing out each row as it goes by.
import csv
from django.core.management.base import BaseCommand

class Command(BaseCommand):

    def handle(self, *args, **options):
        print "Loading CSV"
        csv_path = "./summary.csv"
        csv_file = open(csv_path, 'r')
        csv_reader = csv.DictReader(csv_file)
        for row in csv_reader:
            print(row)
Run it to see what we mean.
$ python manage.py load_summary
Import our model into the command and use it to save the CSV records to the database.
import csv
from foreclosures.models import Summary
from django.core.management.base import BaseCommand

class Command(BaseCommand):

    def handle(self, *args, **options):
        print "Loading CSV"
        csv_path = "./summary.csv"
        csv_file = open(csv_path, 'r')
        csv_reader = csv.DictReader(csv_file)
        for row in csv_reader:
            obj = Summary.objects.create(
                bioguide_id=row['BIOGUIDE_ID'],
                office=row['OFFICE'],
                program=row['PROGRAM'],
                category=row['CATEGORY'],
                year_to_date=row['YTD'],
                amount=row['AMOUNT'],
                year=row['YEAR'],
                quarter=row['QUARTER']
            )
            print(obj)
Run it again and you’ve done it. The data from the summary CSV is loaded into the database.
$ python manage.py load_summary
You can do the same for the detail file - the same steps, creating a load_detail.py file in the management/commands directory the same way you did for the summary file, along with the code to load the CSV.
import csv
from foreclosures.models import Detail
from django.core.management.base import BaseCommand

class Command(BaseCommand):

    def handle(self, *args, **options):
        print("Loading CSV")
        csv_path = "./detail.csv"
        csv_file = open(csv_path, 'r')
        csv_reader = csv.DictReader(csv_file)
        for row in csv_reader:
            obj = Detail.objects.create(
                bioguide_id=row['BIOGUIDE_ID'],
                office=row['OFFICE'],
                quarter=row['QUARTER'],
                program=row['PROGRAM'],
                category=row['CATEGORY'],
                sort_sequence=row['SORT SEQUENCE'],
                date=row.get('DATE') or None,
                transcode=row['TRANSCODE'],
                recordid=row['RECORDID'].strip(),
                payee=row['PAYEE'],
                start_date=row.get('START DATE') or None,
                end_date=row.get('END DATE') or None,
                purpose=row['PURPOSE'],
                amount=row['AMOUNT'],
                year=row['YEAR']
            )
            print(obj)
Note how for the date fields we’re using a specific syntax that tries to grab the value for that key and if there’s any problem (such as an empty string instead of a date) we just use None instead.
Act 4: Hello admin
One of Django’s unique features is that it comes with a custom administration that allows users to view, edit and create records. To see it in action, create a new superuser with permission to edit all records.
$ python manage.py createsuperuser
Then fire up the Django test server.
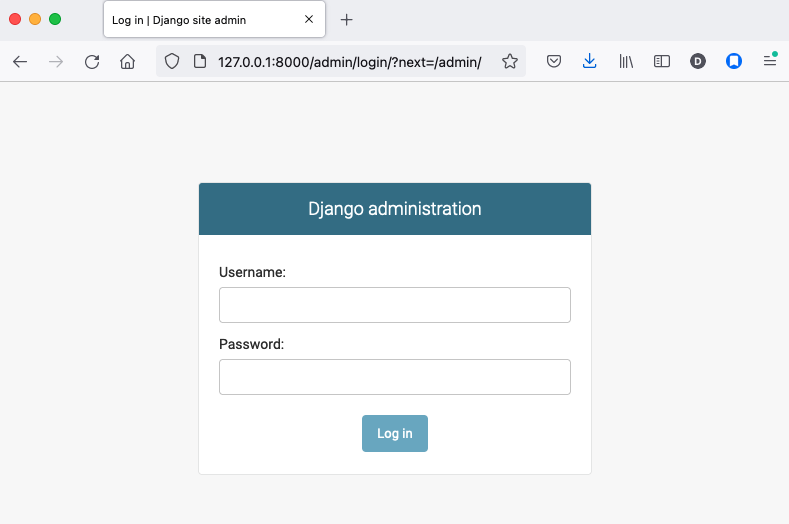
$ python manage.py runserver
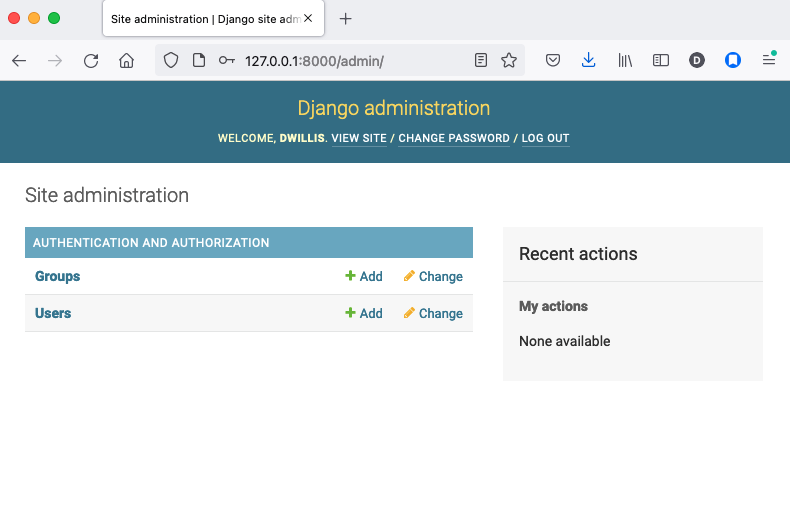
And visit localhost:8000/admin/ and log in using the credentials you just created.
Without any additional configuration you will see administration panels for the apps installed with Django by default.
Adding panels for your own models is done in the admin.py file included with each app. Open academy/admin.py to start in.
from django.contrib import admin
from foreclosures.models import Summary

admin.site.register(Summary)
Now reload localhost:8000/admin/ and you’ll see it added to the index app list.
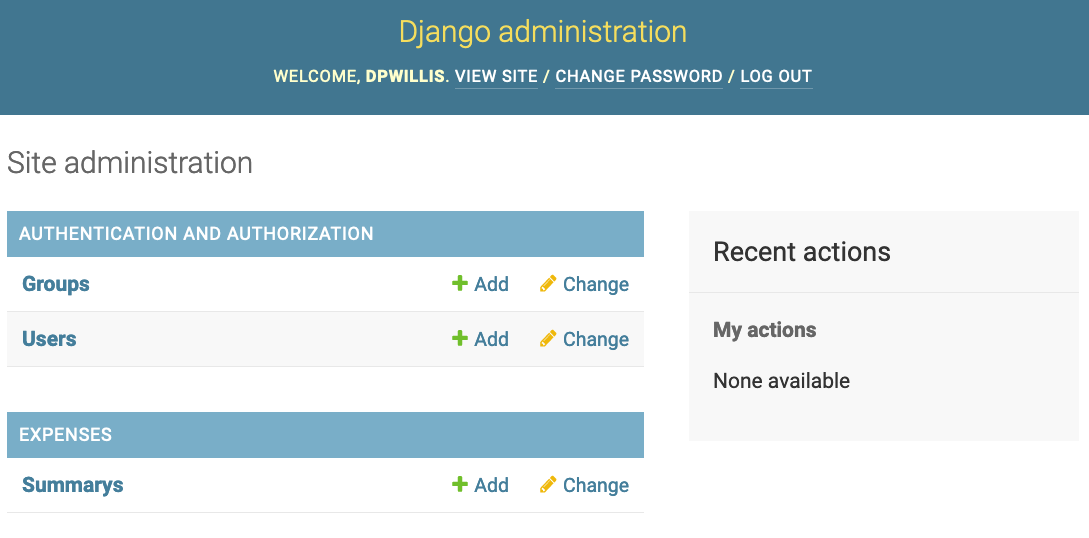
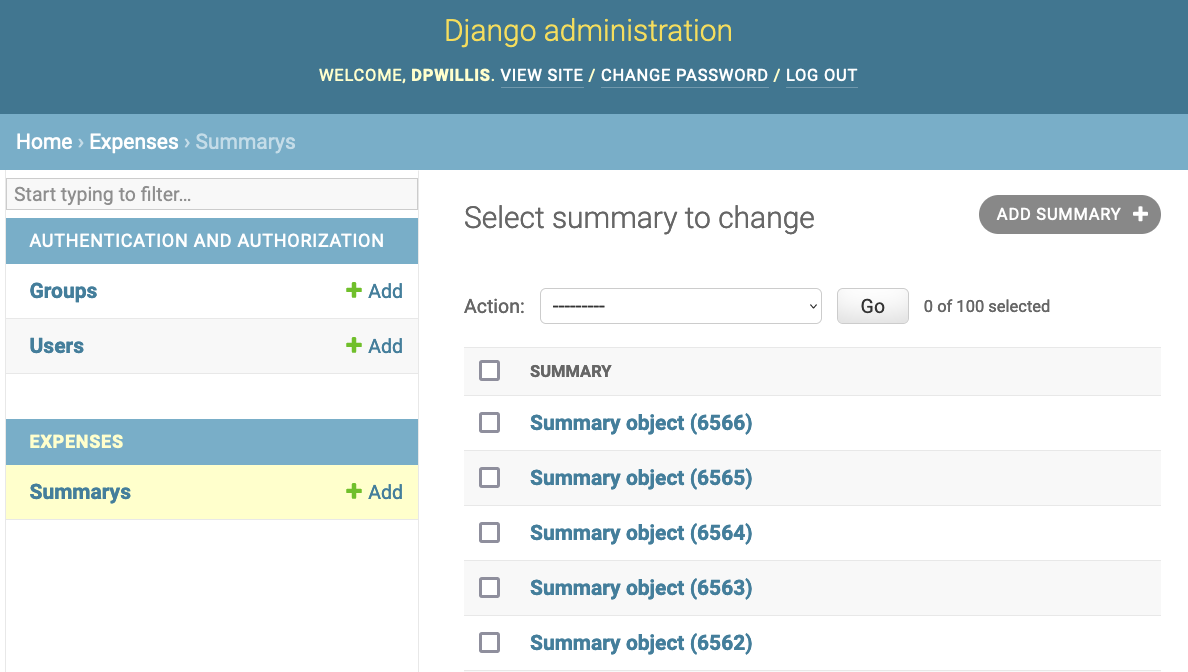
Click on “Summarys” and you’ll see all the records we loaded into the database as a list.
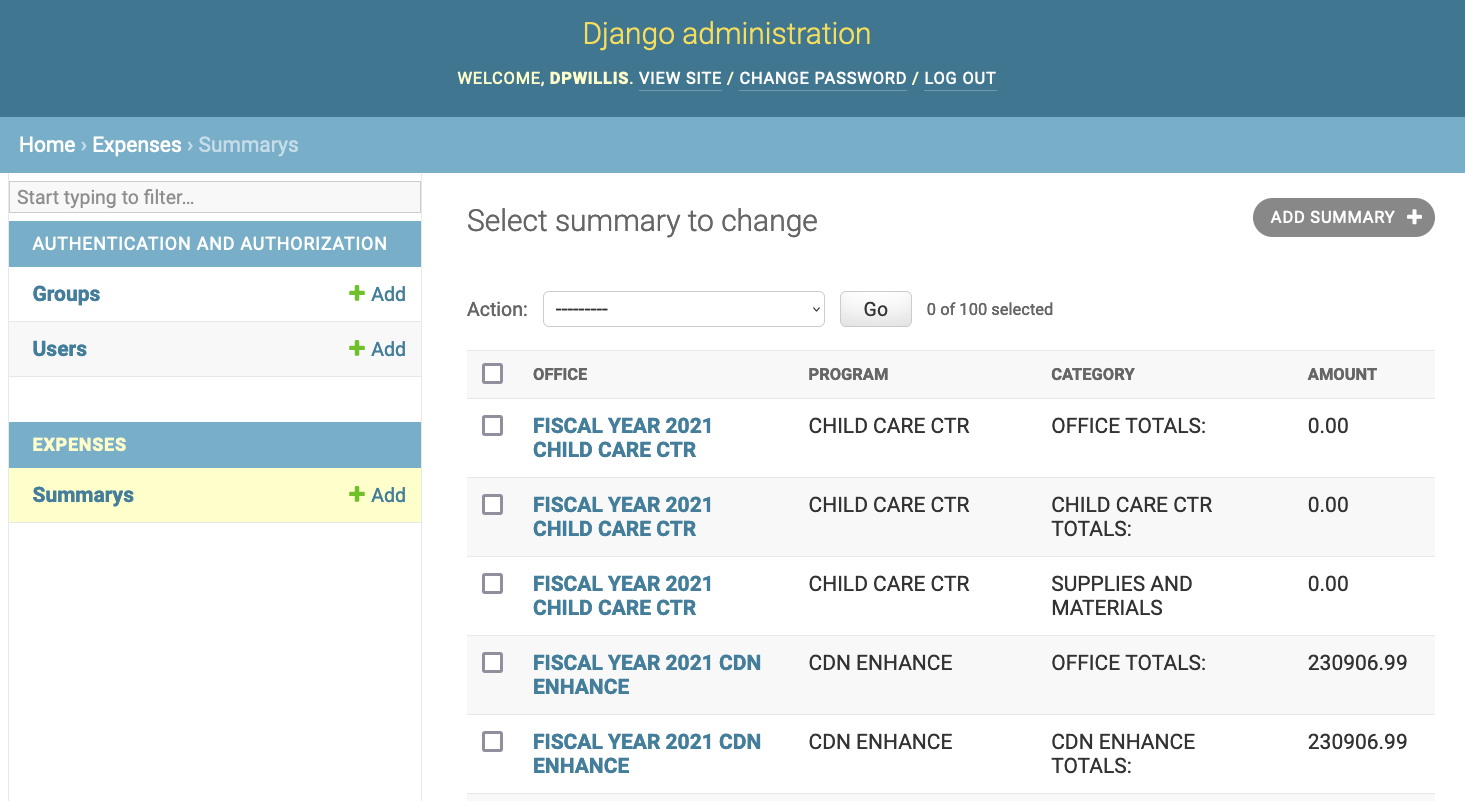
Configure the columns that appear in the list.
from django.contrib import admin
from foreclosures.models import Summary

class NoticeAdmin(admin.ModelAdmin):
    list_display = ("office", "program", "category", "amount")

admin.site.register(Summary, SummaryAdmin)
Reload.
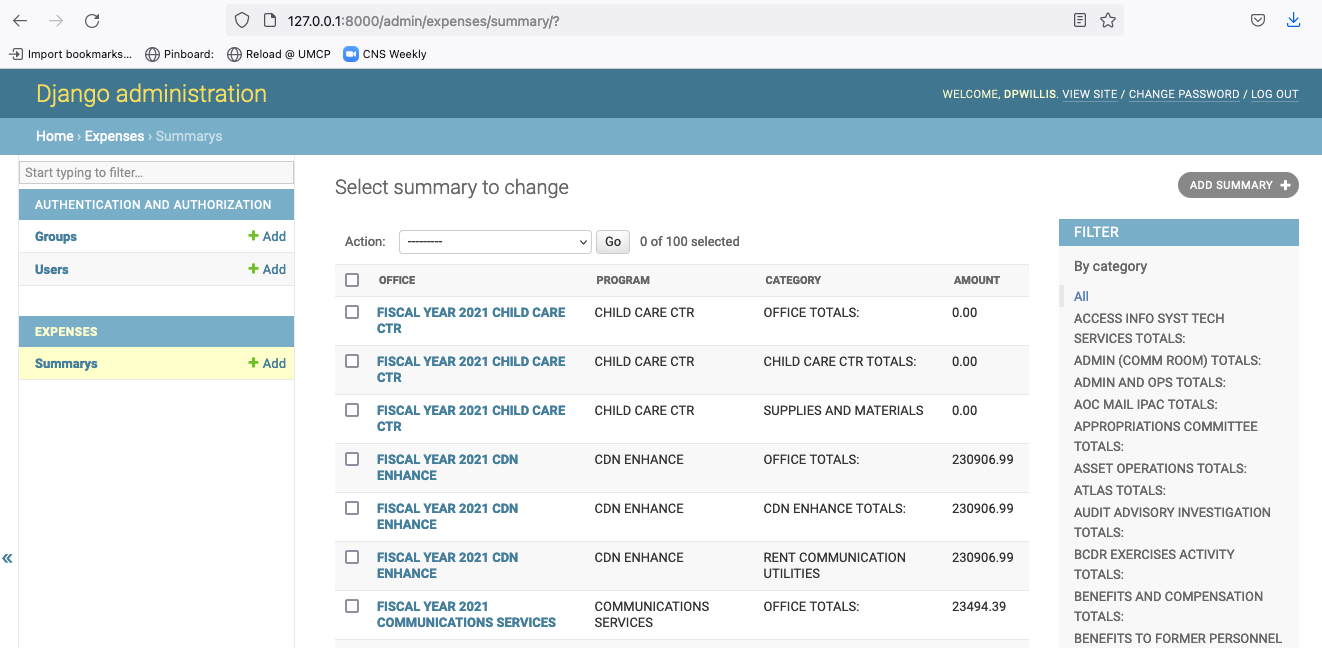
Add a filter.
from django.contrib import admin
from foreclosures.models import Summary

class NoticeAdmin(admin.ModelAdmin):
    list_display = ("office", "program", "category", "amount")
    list_filter = ("category", "program")

admin.site.register(Summary, SummaryAdmin)
Reload.
And now a search.
from django.contrib import admin
from foreclosures.models import Summary

class NoticeAdmin(admin.ModelAdmin):
    list_display = ("office", "program", "category", "amount")
    list_filter = ("category", "program")
    search_fields = ("program",)

admin.site.register(Summary, SummaryAdmin)
Reload.
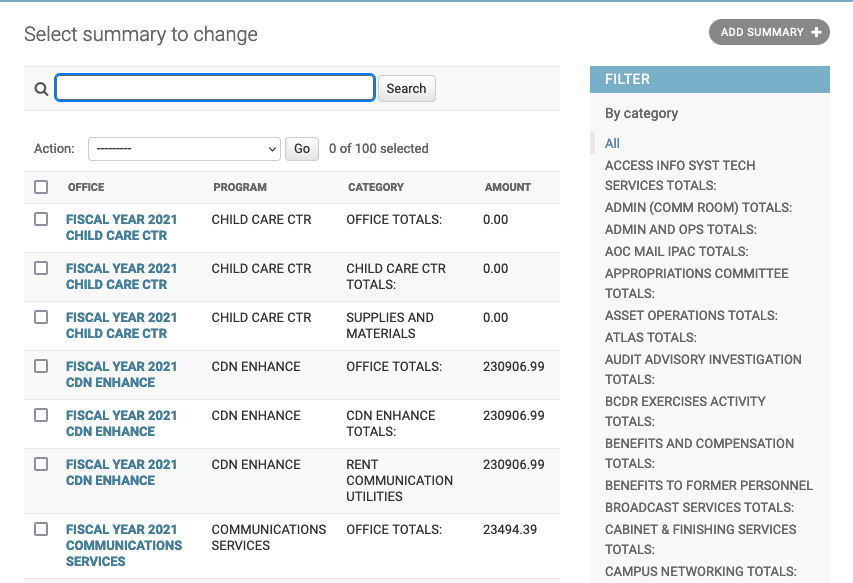
Take a moment to search, filter and sort the list to see how things work. Now we can add a similar admin for the Detail objects:
from django.contrib import admin
from foreclosures.models import Summary, Detail

class NoticeAdmin(admin.ModelAdmin):
    list_display = ("office", "program", "category", "amount")
    list_filter = ("category", "program")
    search_fields = ("program",)

class DetailAdmin(admin.ModelAdmin):
    list_display = ("office", "program", "category", "payee", "purpose", "amount")
    list_filter = ("category", "program", "purpose")
    search_fields = ("program", "payee")

admin.site.register(Summary, SummaryAdmin)
admin.site.register(Detail, DetailAdmin)
Act 5: Hello Views (and Templates)
Now you’re ready to show your data to people who can’t (and shouldn’t) login to your Django app. We do that using views, which are invoked when a specific URL is loaded.
Open foreclosures/views.py and put the following code in it:
from django.http import HttpResponse

def index(request):
  return HttpResponse("Hello, world. You're at the foreclosures index.")
This is the simplest view we can write. When that view is triggered, it will return that text to the browser just as it is. But we need to tie it to a specific url. For that we can create a new file in the foreclosures directory called urls.py and add the following code to it:
from django.urls import path

from . import views

urlpatterns = [
  path('', views.index, name='index'),
]
This first imports a function that helps Django connect urls to views. It then imports the contents of our views.py file and finally defines a pattern: if a user goes to the root url, that means that the index view gets called. All of that occurs in project/foreclosures/urls.py.
But we have more urls for our project, including the admin urls. Check out the urls.py in the project/project directory, and add this to it:
from django.contrib import admin
from django.urls import include, path

urlpatterns = [
  path('foreclosures/', include('foreclosures.urls')),
  path('admin/', admin.site.urls),
]
This urls.py organizes _all_ of the urls we could have for this entire project (we might decide to get expansive and include other congressional data). We _include_ the url we defined that is specific to the foreclosures app.
Now go to http://127.0.0.1:8000/foreclosures/

Now let’s make a better index view, one that tells us a little more about the objects we’ve saved in our database.
Open foreclosures/views.py and put the following code in it:
from django.http import HttpResponse
from foreclosures.models import Summary, Detail

def index(request):
  total_summaries = Summary.objects.count()
  total_detail = Detail.objects.count()
  return HttpResponse(f"Hello, world. You're at the foreclosures index and there are {total_summaries} summary records and {total_detail} records in the database.")
Now go to http://127.0.0.1:8000/foreclosures/ and see that we’ve counted the number of summary and detail objects and sent that to the browser, thanks to string interpolation. There’s a problem here, though: the page’s design is hard-coded in the view. If you want to change the way the page looks, you’ll have to edit this Python code. So let’s use Django’s template system to separate the design from Python by creating a template that the view can use.
First, create a directory called templates in your foreclosures directory. Django will look for templates in there.
Within the templates directory you have just created, create another directory called foreclosures, and within that create a file called index.html. In other words, your template should be at foreclosures/templates/foreclosures/index.html. Because of how the app_directories template loader works, you can refer to this template within Django as foreclosures/index.html.
Put the following code in that template:
<!doctype html>
<html lang="en">
  <head></head>
  <body>
    <h1>House Office Expenses</h1>
  </body>
</html>
Now we need to tell the index view in views.py to use this template. Open foreclosures/views.py and put the following code in it:
from django.shortcuts import render
from foreclosures.models import Summary, Detail

def index(request):
  total_summaries = Summary.objects.count()
  total_detail = Detail.objects.count()
  return render(request, 'foreclosures/index.html', context={'total_summaries': total_summaries, 'total_detail': total_detail})
Here we are using Django’s render shortcut to send all the information we need to the template we made, including how to refer to the objects we’ve created.
Let’s update our template. Open foreclosures/templates/foreclosures/index.html and add the following:
  <!doctype html>
  <html lang="en">
      <head></head>
      <body>
          <h1>House Office Expenses</h1>
          <p>There are {{ total_summaries }} total summary records and {{ total_detail }} records.</p>
      </body>
  </html>
That’s better, and the template engine is similar to that used by Flask (Jinja was inspired by Django’s template syntax, in fact).
Next, we’ll dive into how to retrieve actual model objects from the database.
Act 6: The Django Model API
The python manage.py shell command gives us access to all of the objects defined in our models.py file. Let’s fire up that command and explore the data:
>>> from foreclosures.models import Summary, Detail
>>> summary = Summary.objects.all()[0]
>>> summary
<Summary: Summary object (1)>
>>> summary.program
'OFFICIAL EXPENSES - LEADERSHIP'
That <Summary: Summary object (1)> line isn’t helpful, however. We can fix that back in models.py by adding a method to Summary and Detail. Switch to your foreclosures/models.py and add the following lines:
from django.db import models

class Notice(models.Model):
    bioguide_id = models.CharField(max_length=7)
    office = models.CharField(max_length=500)
    program = models.CharField(max_length=500)
    category = models.CharField(max_length=500)
    year_to_date = models.DecimalField(max_digits=20, decimal_places=2)
    amount = models.DecimalField(max_digits=20, decimal_places=2)
    year = models.IntegerField()
    quarter = models.IntegerField()

    def __str__(self):
        return self.program

class Detail(models.Model):
    bioguide_id = models.CharField(max_length=7)
    office = models.CharField(max_length=500)
    quarter = models.CharField(max_length=1)
    program = models.CharField(max_length=500)
    category = models.CharField(max_length=500)
    sort_sequence = models.CharField(max_length=500)
    date = models.DateField(blank=True, null=True)
    transcode = models.CharField(max_length=15)
    recordid = models.CharField(max_length=500, blank=True, null=True)
    payee = models.CharField(max_length=500)
    start_date = models.DateField(blank=True, null=True)
    end_date = models.DateField(blank=True, null=True)
    purpose = models.CharField(max_length=500)
    amount = models.DecimalField(max_digits=20, decimal_places=2)
    year = models.IntegerField()

    def __str__(self):
        return self.payee
It’s important to add __str__() methods to your models, not only for your own convenience when dealing with the interactive prompt, but also because objects’ representations are used throughout Django’s automatically-generated admin. Now, if you exit the Django shell and repeat the steps above, you’ll see a better representation of each object:
>>> from foreclosures.models import Summary, Detail
>>> summary = Summary.objects.all()[0]
>>> summary
<Summary: SUPPLIES AND MATERIALS>
>>> detail = Detail.objects.all()[0]
>>> detail
<Detail: OCCASIONS CATERERS>
Using Model.objects.all() isn’t great, though, because it pulls in every row in the database. It’s more likely that we’ll want to retrieve specific records, and Django has a way to do that:
>>> from foreclosures.models import Summary, Detail
>>> summary = Summary.objects.get(id=1)
>>> summary
<Summary: SUPPLIES AND MATERIALS>
>>> details = Detail.objects.filter(payee="OCCASIONS CATERERS")
>>> details
<QuerySet [<Detail: OCCASIONS CATERERS>, <Detail: OCCASIONS CATERERS>, <Detail: OCCASIONS CATERERS>, <Detail: OCCASIONS CATERERS>, <Detail: OCCASIONS CATERERS>, <Detail: OCCASIONS CATERERS>, <Detail: OCCASIONS CATERERS>, <Detail: OCCASIONS CATERERS>, <Detail: OCCASIONS CATERERS>, <Detail: OCCASIONS CATERERS>, <Detail: OCCASIONS CATERERS>, <Detail: OCCASIONS CATERERS>]>
The get() function returns a single record and filter() returns a list (called a QuerySet in Django) of records that you can iterate over.
You can even create new objects using the Django API. Now let’s get back to writing more views and templates.
Act 7: More Advanced Views
We have an index page for our app, but what about pages for displaying individual records? Let’s create a view for an individual Summary object in our views.py file:
from django.shortcuts import render, get_object_or_404
from foreclosures.models import Summary, Detail

def index(request):
  total_summaries = Summary.objects.count()
  total_detail = Detail.objects.count()
  return render(request, 'foreclosures/index.html', context={'total_summaries': total_summaries, 'total_detail': total_detail})

def summary(request, summary_id):
  summary = Summary.objects.get(id=summary_id)
  return render(request, 'foreclosures/summary.html', {'summary': summary})
This will do a simple lookup based on a numeric id for a Summary object, which is provided from the request’s URL. That means we’ll need to design a url in urls.py for this:
from django.urls import path

from . import views

urlpatterns = [
  path('', views.index, name='index'),
  # example: /summary/1/
  path('summary/<int:summary_id>/', views.summary, name='summary'),
]
That connects a URL in the form of /summary/1/ to the summary function in views.py. Then we’ll need a template to handle that, so let’s add a summary.html file to our templates/foreclosures/ directory and populate it with this:
<!doctype html>
<html lang="en">
    <head></head>
    <body>
        <h1>Summary Record for {{ summary.year }}, Quarter {{ summary.quarter }}</h1>
        <p>Program: {{ summary.program }}</p>
        <p>Category: {{ summary.category }}</p>
        <p>Office: {{ summary.office }}</p>
        <p>Amount: {{ summary.amount }}</p>
        <p>Year To Date: {{ summary.year_to_date }}</p>
    </body>
</html>
Save that and head to http://127.0.0.1:8000/foreclosures/summary/1/.
Act 8: Models and Slugs
While the URL above is useful, it’s not particularly informative, and part of Django’s core philosophy is meaningful URLs. In order to demonstrate this, let’s create a new model for category, an attribute of both the Summary and Detail models. Put this at the top of your foreclosures/models.py file:
from django.db import models

class Category(models.Model):
    name = models.CharField(max_length=200, unique=True)
    slug = models.SlugField(max_length=200)

    def __str__(self):
        return self.name
There are two new things here. First is the “unique=True” constraint we’re putting on the category name. That means that only want one record for each category name. Django will enforce that when we add data. Second is the SlugField, which is a handy Django convention based on the idea of a story slug. Essentially it’s a lowercased version of the name with punctuation removed and spaces replaced by dashes. Let’s make that migration and run it:
$ python manage.py makemigrations foreclosures
$ python manage.py migrate foreclosures
We’ll need to add a loader to populate the Category model with data, and we can use the summary.csv to do that. In foreclosures/management/commands, create load_category.py and put this in it:
import csv
from foreclosures.models import Category
from django.template.defaultfilters import slugify
from django.core.management.base import BaseCommand

class Command(BaseCommand):

    def handle(self, *args, **options):
        print("Loading CSV")
        csv_path = "./summary.csv"
        csv_file = open(csv_path, 'r')
        csv_reader = csv.DictReader(csv_file)
        for row in csv_reader:
            if row['CATEGORY'] != '':
                obj, created = Category.objects.create(name=row['CATEGORY'], slug=slugify(row['CATEGORY']))
                print(obj)
A couple of things to note here: first, we import a Django template filter called slugify that, you guessed it, changes a string into a slug version of itself. Second, we use that slugify function in creating the new object. Now, let’s run that loader:
$ python manage.py load_category
And we get an error. Specifically, the loader tried to create a Category object that already exists, since these categories appear multiple times in the summary.csv. What we need to do is to create a new object only if that category doesn’t already exist, and Django has you covered for that, too. Change the loader to this:
import csv
from foreclosures.models import Category
from django.template.defaultfilters import slugify
from django.core.management.base import BaseCommand

class Command(BaseCommand):

    def handle(self, *args, **options):
        print("Loading CSV")
        csv_path = "./summary.csv"
        csv_file = open(csv_path, 'r')
        csv_reader = csv.DictReader(csv_file)
        for row in csv_reader:
            if row['CATEGORY'] != '':
                obj, created = Category.objects.get_or_create(name=row['CATEGORY'], slug=slugify(row['CATEGORY']))
                print(obj)
Here, instead of Category.objects.create we use Category.objects.get_or_create, which gets an existing record or creates one if it cannot find it (the created variable is a boolean value indicating if the object is newly created or not).
Now we can run the loader again:
$ python manage.py load_category
And this time the loader runs properly and doesn’t raise an error. Now we can use the slugs created by the loader in designing urls. In foreclosures/urls.py, add the following lines:
from django.urls import path

from . import views

urlpatterns = [
    path('', views.index, name='index'),
    path('categories/', views.categories, name='categories'),
    path('categories/<slug>/', views.category_detail, name='category_detail'),
    path('summary/<int:summary_id>/', views.summary, name='summary'),
]
This creates URLs for a main page for categories and a detail page for each category, the latter using a slug. Next, in foreclosures/views.py, add the following:
from django.shortcuts import render, get_object_or_404
from foreclosures.models import Summary, Detail, Category

def index(request):
  total_summaries = Summary.objects.count()
  total_detail = Detail.objects.count()
  return render(request, 'foreclosures/index.html', context={'total_summaries': total_summaries, 'total_detail': total_detail})

def summary(request, summary_id):
  summary = Summary.objects.get(id=summary_id)
  return render(request, 'foreclosures/summary.html', {'summary': summary})

def categories(request):
  categories = Category.objects.all().order_by('name')
  return render(request, 'foreclosures/categories.html', {'categories': categories})

def category_detail(request):
    pass
We’ll start with the categories view, which fetches all of our Category objects and returns them to a template. Except we need to make that template, so in foreclosures/templates/foreclosures create categories.html and put this inside:
<!doctype html>
<html lang="en">
  <head></head>
  <body>
    <h1>House Office Expense Categories</h1>

    {% if categories %}
      <ul>
      {% for category in categories %}
          <li><a href="/categories/{{ category.slug }}/">{{ category.name }}</a></li>
      {% endfor %}
      </ul>
    {% else %}
        <p>No categories are available.</p>
    {% endif %}

  </body>
</html>
Here we loop over the list of Category objects and create a link for each one. Now we can check that URL by starting the server:
$ python manage.py runserver
And heading to http://127.0.0.1:8000/foreclosures/categories/ will get you a page listing all of the categories in alphabetical order, along with a link to each. That’s pretty good, but the names are in all-caps. We can fix that using one of Django’s built-in template tags. In the categories.html template, change this line:
<!doctype html>
<html lang="en">
  <head></head>
  <body>
    <h1>House Office Expense Categories</h1>

    {% if categories %}
      <ul>
      {% for category in categories %}
          <li><a href="{{ category.slug }}/">{{ category.name|title }}</a></li>
      {% endfor %}
      </ul>
    {% else %}
        <p>No categories are available.</p>
    {% endif %}

  </body>
</html>
That changes each name to be titlecase. Go back to the browser and hit reload to see the results. Much better.
Now let’s make those category links show something. In your foreclosures/views.py file, add the following to the category_detail function:
from django.shortcuts import render, get_object_or_404
from foreclosures.models import Summary, Detail, Category

def index(request):
  total_summaries = Summary.objects.count()
  total_detail = Detail.objects.count()
  return render(request, 'foreclosures/index.html', context={'total_summaries': total_summaries, 'total_detail': total_detail})

def summary(request, summary_id):
  summary = Summary.objects.get(id=summary_id)
  return render(request, 'foreclosures/summary.html', {'summary': summary})

def categories(request):
  categories = Category.objects.all().order_by('name')
  return render(request, 'foreclosures/categories.html', {'categories': categories})

def category_detail(request, slug):
  category = get_object_or_404(Category, slug=slug)
  category_summary = Summary.objects.filter(category=category.name).count()
  category_detail = Detail.objects.filter(category=category.name).count()
  return render(request, 'foreclosures/category_detail.html', {'category': category, 'category_summary': category_summary, 'category_detail': category_detail})
Now create the foreclosures/templates/foreclosures/category_detail.html template and put the following in it:
<!doctype html>
<html lang="en">
  <head></head>
  <body>
    <h1>House Office Expenses - {{ category.name|title }}</h1>

    <p>Summary records: {{ category_summary }}</p>
    <p>Detail records: {{ category_detail }}</p>

  </body>
</html>
Now fire up the server and go to http://127.0.0.1:8000/foreclosures/categories/franked-mail/